I am so exicted. While browsing the web I have come across alot of posts for homemade face powder. I'm so impressed! It actually works- like really, really good!
Now, I have long used baby powder as my setting powder. I used to use the talc based powder as the cornstarch based one can cause blemishes. However, I have recently changed to the cornstarch based powder as it seems to give me a better (softer) finish and its more absorbent (at least for me) than talc. I have oily skin (like the desert of Kuwait) but its not really blemish prone and I haven't had any problems with the cornstarch. But don't say I didn't warn you in case you try it and break out a week later.
The only issue I have ever had with baby powder is that it can be too white, especially in the summer months when bronzer is better. I remedy this by applying it very lightly and wearing a slightly darker foundation. Now, I have found an even better solution.
 Pure cornstarch (in the baking aisle)
and
Pure cornstarch (in the baking aisle)
and
 unsweetened cocoa powder (yes, like Hersheys- also in the baking aisle)
I was amazed. Pure cornstarch is actually finer milled and more absorbent than the baby powder version and its cheaper but its really, really white.
Cocoa powder has natural antioxidant properties and isn't a skin irritant plus it has that lovely neutral, natural, soft brown color.
Mix them together and Ta-da ! Perfect oil absorbing loose face powder.
I am light so I started with 1/2 cup cornstarch to 1 teaspoon cocoa powder. Yes, thats alot to start with but for some reason I can't do anything in small batches. This mix is perfect for me. I mix it up then put it in a old glass jar. I sprinkle some on the lid, use a big fluffy brush, swirl and tap, then buff onto skin over my foundation. I am perfectly matte and shine free all day. I love it.
Now, you need to custom mix this for your skin tone. Perhaps start out with 1 tablespoon of cornstarch and a 1/8 teaspoon or a sprinkle of cocoa, adding more cocoa to deepen the shade. To much cocoa, add more cornstarch. Record your efforts so you have the correct measurments. It really is trail and error. Once you have your perfect blend you will never go back to regular powder. Since I am light I can actually get away with no cocoa powder in my cornstarch, especially in the winter, so for me the small amount of cocoa to large amount of cornstarch was fine, I didn't have to try too hard.
A couple of tips-
-This is really messy to make so beware, you are working with 2 finely ground powders.
-You can also make this with baby powder, not just pure cornstarch, and if you are blemish prone you may want to use talc based baby powder ( there is alot of information on talc out there about how bad it is, supposedly, so do your own research. I personally don't have a problem with talc, but to each his own.)
- This may be to drying for dry skin, it is very absorbent.
- This can double as a sheer powder foundation for those who have great skin or just want a very natural look. The cocoa seems to give enough color along with the mattifying cornstarch to just even out your skin tone. It won't cover anything but it will even it out.
I use this and am matte and touch up free all day. I usually have my makeup on 12 or more hours so this really is a remarkable feat. I am waiting for the real test to come in th dead of summer so I will update then but so far I have never ever found a better face powder.
unsweetened cocoa powder (yes, like Hersheys- also in the baking aisle)
I was amazed. Pure cornstarch is actually finer milled and more absorbent than the baby powder version and its cheaper but its really, really white.
Cocoa powder has natural antioxidant properties and isn't a skin irritant plus it has that lovely neutral, natural, soft brown color.
Mix them together and Ta-da ! Perfect oil absorbing loose face powder.
I am light so I started with 1/2 cup cornstarch to 1 teaspoon cocoa powder. Yes, thats alot to start with but for some reason I can't do anything in small batches. This mix is perfect for me. I mix it up then put it in a old glass jar. I sprinkle some on the lid, use a big fluffy brush, swirl and tap, then buff onto skin over my foundation. I am perfectly matte and shine free all day. I love it.
Now, you need to custom mix this for your skin tone. Perhaps start out with 1 tablespoon of cornstarch and a 1/8 teaspoon or a sprinkle of cocoa, adding more cocoa to deepen the shade. To much cocoa, add more cornstarch. Record your efforts so you have the correct measurments. It really is trail and error. Once you have your perfect blend you will never go back to regular powder. Since I am light I can actually get away with no cocoa powder in my cornstarch, especially in the winter, so for me the small amount of cocoa to large amount of cornstarch was fine, I didn't have to try too hard.
A couple of tips-
-This is really messy to make so beware, you are working with 2 finely ground powders.
-You can also make this with baby powder, not just pure cornstarch, and if you are blemish prone you may want to use talc based baby powder ( there is alot of information on talc out there about how bad it is, supposedly, so do your own research. I personally don't have a problem with talc, but to each his own.)
- This may be to drying for dry skin, it is very absorbent.
- This can double as a sheer powder foundation for those who have great skin or just want a very natural look. The cocoa seems to give enough color along with the mattifying cornstarch to just even out your skin tone. It won't cover anything but it will even it out.
I use this and am matte and touch up free all day. I usually have my makeup on 12 or more hours so this really is a remarkable feat. I am waiting for the real test to come in th dead of summer so I will update then but so far I have never ever found a better face powder.
I was reading how you could use tea or coffee to dye dark hair. Its supposed to be a natural replacement for commercial hair dye. I have naturally dark brown hair that I dye black. Every 4-6 weeks I need a root touch up. I don't want to have to dye my hair that often (even if its only the roots with a 2-3 times a year full head dye job) as it is damaging so I decided to give this a go.
The recipe is simple. Basically the stronger the brew of the tea the stronger the dye. You need to use plain old tea bags- not green tea, as green tea is to light. Look for tea that contains orange pekoe and/or black. Orange pekoe is a black tea. I use a no-name brand I get at my local grocery. Its .99 cent for 100 bags and its the same tea I make iced tea with.
I boiled 2 cups of water and added 6 tea bags. I put it (including the tea bags) in a glass jar and let it sit overnight.
The next morning I poured it over my brushed yet unwashed hair. I worked it into my scalp, wrapped my hair up in a plastic bag and then a towel and let it sit for one hour.
I squeezed out the leftover teabags into a small cup with a squirt or two of my shampoo. Use whatever amount of shampoo you would normally use.
After the hour I shampooed, with the teabag/shampoo mix and conditioned my hair ( I use my semi-homemade coconut milk shampoo, which I previously posted on, and my coconout milk honey conditioning rinse, which I will post on later.)
I was shocked that it actually worked. Now there is not a major difference in color like you would get with commercial hair dye but my roots were noticably darker. If you are going from, lets say blond to dark hair, this isn't going to cut it. However, to freshen up already dark natural or dyed hair this is great. I need to see how long this will last but I am thinking this may really help me stretch some serious time between colorings. If I have to to this every week ( or even twice a week) it will be worth it to me. I wont do it daily a it is way to time consuming so I am hoping it will hold up through at least a few shampoos. I shampoo daily.
I am also planning on making a stronger "dye" next time. I will use 1 cup water to the 6 tea bags. I felt like the 2 cups was way to much to just do my roots. It drips everywhere and I felt I wasted half the mix and made a mess. You will make a mess anyway since this is only "tea water" and has no thickness whatsoever. It drips everywhere. That is why I wrapped my head in a plastic bag and then a towel, it really helped.
Im impresed, really, who wuld have thought little old tea bags could dye your hair!
I came across a few post that claim using a honey hair rinse as a cheap, homemade replacement for conditioner. Intrigued I just had to try it.
It is quite simple to do all you need is
1 tablespoon of honey
4 cups very warm/hot water
What I did was add the honey to a large, easy pourable container of hot water and stirred until the honey melted.
After shampooing ( I used my semi- homemade coconut milk shampoo - my previous post) You simply squeeze the excess water out of hair and dump the whole 4 cups of honey water over your head ( I avoided the front and top of my head as my roots are oily) and work it through hair. Let it sit while you do other shower things and rinse well.
After air drying ( I do not blow dry) I was quite impressed. With just honey and water my hair was soft and pretty shiny BUT, and thats a bit BUT, there were some issues.
First of after rinsing my hair was a bear to untangle. I had so many tangles I had to go very slow as not to pull out my hair.
Second, while my hair was soft and shiny my ends still were a bit dry and looked dull. I know thats weird to have both soft yet dry hair but that is exactly what happened. I applied my coconut oil as a leave in to remedy the dryness, which worked fine, but had to use a bit more than usual.
Third. I felt the whole 4 cup water thing was way to much. I have long hair (bra strap legnth) but its normal to thin in thickeness. I really could have just used a cup and been fine with that "rinse".
While I think this honey rinse is a decent conditoner alternative I think my hair needs a bit more on a daily basis, which is why I used this as a base for my coconut milk honey conditoning rinse that I will post on later as I need to perfect it.
While fishing around the web one day I came across a few recipes for homemade coconut milk shampoo. Most call for liquid castille soap which I don't use and won't buy so I experimented a bit and came up with the PERFECT shampoo for me.
I generally co-wash with a weekly shampoo but it never fails every 2-3 months or so I go back to a "normal" shampoo/ conditioner routine because I miss the feel of shampoo sudsing, then after a week I hate it, so I go back to co- wash, then back to shampoo, etc..
Finally I found the answer- Coconut milk shampoo.
The recipe is so so simple-
1/3 cup baby wash (not baby shampoo, I will explain why)
1/4 cup coconut milk (homemade- how-to to follow)
Stir gently together and pour in any old shampoo or squirt bottle. Shake before each use.
HOMEMADE COCONUT MILK-
1/2 cup shredded coconut
2-4 cup very hot water
Put coconut in blender, add 1 cup hot water, blend for 30 second to a minute ( I actually have a liquify button on my blender so thats the button I hit)
Strain through cheesecloth if you have it, if not a small holed strainer or even a coffee filter would work. I have flour sack towels so that is what I use.
Squeeze the pulp to get it to release more milk
Put the pulp back in the blender, add another cup water and repeat the process. Can repeat up to 4 times
I usually only do 2 "rounds" total because I blend the coconut so much by round 2 I'm left with basically coconut flour. If you blend gently, you can get 4 cups of coconut milk out of the original 1/2 cup coconut flakes.
Most recipes call for unsweetend coconut flakes but I only have sweetened coconut flakes at my local stores. Now they contain sugar (of course) but they also contain propylene glycol, which is a perservative in this case. Many regular shampoos and conditoiners contain propylene glycol as a humectant. So I have no problem using the sweetened coconut. I am hoping the propylene glycol actually will keep my milk fresher longer. This homemade coconut milk is thin, much like regular milk. I like it. You could use canned coconut milk (I have never) but I think that is probably much richer and thicker than the homemade so your results may be different. Plus the homemade is fun and cheaper.
Also, the reason I use baby wash instead of baby shampoo is that baby shampoo simply doesn't work for me. I have tried. It doesn't produce a lather I like and it seems hard to work through my hair. Plus I feel like I need to shampoo twice which is something I have long since gotten away from. Good baby shampoo (like Johnson's) only has very gentle cleansers which don't cut it for me. I want gentle but I still want clean.
Baby wash on the other hand, while still gentle, has more cleaning ability and produces a more bubbly lather. Most baby washes use sodium laureth sulfate somewhere on the ingredient list ( so do some cheap baby shampoos but if you don't want to scan all the labels just buy whatever baby wash you grab) If sodium laureth sulfate is first on the ingredient list its a stronger wash- I tend to purchase those that have it third on the list. Sodium laureth sulfate the only sulfate my hair likes. If you are anti-sulfate or sulfate free go ahead and try the baby shampoo but I feel the results are far, far (like 100 times) better with baby wash.
Using the shampoo my hair is soo soft, managable and moisturized. Plus its clean and I get my suds that I like so much. I use it along with my homemade coconut milk and honey conditioning rinse that I will post about later (I am still perfecting that recipie a bit) and my coconut oil as a leave in. This combo is giving me perfect hair, well, as perfect as my hair will get. Its soft, shiny, moisturized, feels thicker and looks better. The only downfall is my hair is very tangly after rinsing. There is no detangling agents in this homemade mix. So, I just take more time detangling. The results are worth it. I am on day four and I swear my hair keeps getting better daily which is something I can never ever say after day four. Usually by then I need a clarifier or I need to alternate my co-washing conditioner beacause my hair is greasy or flat or just plain "not right". Im sure I will need to clarify eventually (maybe a week maybe two) because the oils will eventually build up but so far I am one happy camper.
One last note- I have no idea how long this will stay fresh for. Coconut milk will eventually sour. This is why I make it such a small batch . I do double my recipie beacause it is watery and I use alot shampooing daily. I have no problem after four days but I don't know how far I can push it. Will update on that one later. So, your best bet is to do small batches more frequently. The homemade coconut milk itself will keep in the fridge at least a week . Since I use it both in my shampoo and conditioner I don't have much leftover anyway.
This recipe is just what works for me. I have normal to thin hair with oily roots and dry legnth and ends. My hair is long and has a slight wave. I do color it. There are many variations you could try. You could even use your own favorite shampoo and just use the coconut milk as an added moisturizing agent. You could lessen the shampoo, add more coconut milk, less coconut milk, mix 50/50 etc.
This may work great with Suave coconut shampoo as a double coconut whammy. Whatever, try it, have fun and your hair will thank you.
Product review - M.A.C. Russian Red lipstick
 Well, this review is a bit off the beaten path. Russian Red is not by any means "Champagne Beauty on a Beer Budget" Its champagne beauty alright, but with a $15 price tag its not beer budget, at least not for me.
This lipstick costs only a buck or two less than my whole makeup regime combined. Is it worth it? Well, I would be here doing this review if it wasn't.
Russian Red is a very iconic lipstick, and for good reason. This lipstick is a beautiful true, blue based, classic, elegant red. It could work on many skin tones, as I feel it does lean a bit torward neutral. Its not a bright red, which I do tend to prefer a bit more, but its not a deep brownish , or blood red either.
Its creamy and very pigmented. It applies like a dream, so smooth and easy. It feels very light and even though its matte its not drying. On me it last all day. If I am having a long evening I may touch up after dinner or before going out but for the most part, for me, its really not needed. The color stays true - all day, never fading out or turning fushia, cherry or orange. If you do need to reapply it never feels heavy.
This is one of those red lipsticks that go with a cute little colorful sundress, jeans and a tee, or your most elegant evening gown. It also looks good with either a cat eye, neutral eyes or even a very soft smokey eye. I do red lips every single day and I can wear Russian Red every day if I wanted.
I have found this has a faint sweet vanilla scent but no "lipsticky" taste.
I have read many many posts about drugstore dupes for Russian red. Sorry, the ones I have tried will NOT replace Russian Red. I will address some of them. Please note, all of these lipsticks are not bad lipsticks, I actually like, even own and wear them, but they are NOT Russian Red
N.Y.C. Retro Red .99 cents - Much, much more orange than Russian Red, different texture- its a bit creamier. However, the color payoff just as good and it stay true. NOTE- if your willing to experiment you can mix Retro red with NYC Sheer Red and get a damn close color match for Russian red for $2.00, of course wear time and texture will be nowhere as close.
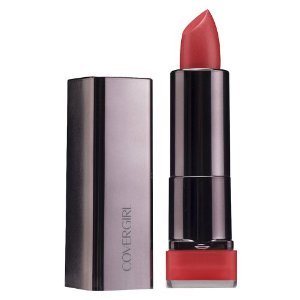
Covergirl Hot- This has been my go to lipstick since I've been on my red kick. I really like this lipstick. However its far from perfect. Compared to Russian Red the staying power is the same, maybe even better. ( I demand long wearing lipstick, I HATE to have to touch up all the time) The texture is close but Hot is heavier and thicker feeeling. Hot has a comparable but much stronger scent. Also my biggest problem with Hot is that it does not stay true. It goes on a poppy red and as the day wears on it turns more cherry red. If you touch up it can feel a bit heavy. In terms of actual shade Hot is still blue based but its brighter and while still fairly neutral it pulls coral/poppy red. The shade is NOT a classic red like Russian red.
Wet-n-Wild Stoplight red- Now this is always mentioned as an exact dupe for MAC Ruby Woo (Russian Reds sister which now I am itching to buy - argghhh!)). However, if I had to pick out of all of them, I think this the closest to Russian Red, its not an exact clor match (none are) but it is a blue based red, just a brighter and truer classic red. Swatched on skin Russian red looks browner than both this and Hot. However, Stoplight Red feels the same and stays true. Its nowhere near as stay put as Russian Red but its only 2 dollars and its a great little lipstick.
I have to give mention to Revlon. I do not own any Revlon lipsticks so cannot make a true call but I have seen so many posts that claim Revlons matte Really Red and the super lusturous Certainly Red are good dupes for Russian Red, so they may be worth checking out.
All in all I am glad I splurged and bought Russian Red. I ordered directly from MAC and it was free shipping and I got it in 3 days. Not bad. Now $15 bucks, in my opinion, a bit overpriced, but it is a fantastic lipstick and I will reorder when I have a bit of extra money to treat myself. Its worth it to have in your red lipstick collection.
Well, this review is a bit off the beaten path. Russian Red is not by any means "Champagne Beauty on a Beer Budget" Its champagne beauty alright, but with a $15 price tag its not beer budget, at least not for me.
This lipstick costs only a buck or two less than my whole makeup regime combined. Is it worth it? Well, I would be here doing this review if it wasn't.
Russian Red is a very iconic lipstick, and for good reason. This lipstick is a beautiful true, blue based, classic, elegant red. It could work on many skin tones, as I feel it does lean a bit torward neutral. Its not a bright red, which I do tend to prefer a bit more, but its not a deep brownish , or blood red either.
Its creamy and very pigmented. It applies like a dream, so smooth and easy. It feels very light and even though its matte its not drying. On me it last all day. If I am having a long evening I may touch up after dinner or before going out but for the most part, for me, its really not needed. The color stays true - all day, never fading out or turning fushia, cherry or orange. If you do need to reapply it never feels heavy.
This is one of those red lipsticks that go with a cute little colorful sundress, jeans and a tee, or your most elegant evening gown. It also looks good with either a cat eye, neutral eyes or even a very soft smokey eye. I do red lips every single day and I can wear Russian Red every day if I wanted.
I have found this has a faint sweet vanilla scent but no "lipsticky" taste.
I have read many many posts about drugstore dupes for Russian red. Sorry, the ones I have tried will NOT replace Russian Red. I will address some of them. Please note, all of these lipsticks are not bad lipsticks, I actually like, even own and wear them, but they are NOT Russian Red
N.Y.C. Retro Red .99 cents - Much, much more orange than Russian Red, different texture- its a bit creamier. However, the color payoff just as good and it stay true. NOTE- if your willing to experiment you can mix Retro red with NYC Sheer Red and get a damn close color match for Russian red for $2.00, of course wear time and texture will be nowhere as close.
Covergirl Hot- This has been my go to lipstick since I've been on my red kick. I really like this lipstick. However its far from perfect. Compared to Russian Red the staying power is the same, maybe even better. ( I demand long wearing lipstick, I HATE to have to touch up all the time) The texture is close but Hot is heavier and thicker feeeling. Hot has a comparable but much stronger scent. Also my biggest problem with Hot is that it does not stay true. It goes on a poppy red and as the day wears on it turns more cherry red. If you touch up it can feel a bit heavy. In terms of actual shade Hot is still blue based but its brighter and while still fairly neutral it pulls coral/poppy red. The shade is NOT a classic red like Russian red.
Wet-n-Wild Stoplight red- Now this is always mentioned as an exact dupe for MAC Ruby Woo (Russian Reds sister which now I am itching to buy - argghhh!)). However, if I had to pick out of all of them, I think this the closest to Russian Red, its not an exact clor match (none are) but it is a blue based red, just a brighter and truer classic red. Swatched on skin Russian red looks browner than both this and Hot. However, Stoplight Red feels the same and stays true. Its nowhere near as stay put as Russian Red but its only 2 dollars and its a great little lipstick.
I have to give mention to Revlon. I do not own any Revlon lipsticks so cannot make a true call but I have seen so many posts that claim Revlons matte Really Red and the super lusturous Certainly Red are good dupes for Russian Red, so they may be worth checking out.
All in all I am glad I splurged and bought Russian Red. I ordered directly from MAC and it was free shipping and I got it in 3 days. Not bad. Now $15 bucks, in my opinion, a bit overpriced, but it is a fantastic lipstick and I will reorder when I have a bit of extra money to treat myself. Its worth it to have in your red lipstick collection.
Finding the perfect red lipstick - Part 3

 Well , we have come to part three of finding the perfect red lipstick. Unfortunately , my super cheapy finds have not worked perfectly for me.
Oh, some could work, but when it comes to lipstick (especially red lipstick) I am very, very picky.
Therefore, I have moved on to more expensive, yet still reasonable drugstore lipstick finds.
My two favorite are L'oreal's "British Red " and Covergirls "Hot."
Now, both run about $6.00 to $8.00 at most places. Walmart is the cheapest. These lipsticks are much more expensive than what I would normally look at. I got "Hot" for around $3.00 because its about $6.00 at Walmart and I had a $3.00 off coupon."British Red" still cost me $7.00 with a $1.00 off coupon at Rite-Aid.
Both of these lipsticks are easily found at most mass market retailers or drugstores. Many drugstores like Rite-aid or Walgreens offer a b.o.g.o 50% off often. Quite often I have found Hot sold out at many places .
"British Red" from L'oreal is a gorgeous, creamy, lightweight, non-drying, shiny, satin finish corally red. I LOVE THIS SHADE. It makes me feel "rich" and sophisticated. However, it can pull orangey and is not a true red (in my opinion). Also, it is not long wearing enough for me. You need to apply this multipe times and touch up often to maintain its richness. Since I am used to wearing matte lipsticks this is a bit to "sheer" and glossy for me, even though I love the lightweight non-drying feeling of it. If this was a .99 cent to a $2.00 lipstick I might deal with the downfalls but not for $7.00. Sorry. I am way cheap and really, really hard to please. I want RED but am not willing to be high mainteance to look high maintenace. HAA!! (and it is possible)!
Covergirl's "Hot". Well, this baby is my (so far) all time winner for cheap red lipsticks. Why? well, its rich, creamy, dries to a long lo-o-ong lasting matte, yet non-drying finish. I can literally apply this in the morning an never touch up. I mean never (14 hrs). The color is great. Pat Mcgrath, the makeup artist for Covergirl, used this on 40+ different models in a spring 2013 fashion show. (sorry, I don't remember which one). I figured if 40+ models of all different skin tones could wear it so could I. Taylor Swift also uses this color. Plus, I have read its a close dupe to the famous MAC Russian Red.
Now, "Hot " does have a few downfalls. First, it doesn't seem true to shade all the time. Let me explain. On me it applies a vibrant poppy, yet still neutral, red. ( Its a blue red with a hint of coral). However, sometimes it can set up as a more cherry red (more truly cool blue based). Its sort off odd, but I still think it can work for alot of skin tones. If I apply it very heavy it seems to stay true to the poppy shade (which I prefer). But, applied heavily it can bleed (badly)and get on teeth. This lipstick is creamy but very heavy. It also stains. I mean it stains badly. I have to scrub, scrub , scrub my lips to remove it all and sometimes I wake up in the morning and my husband says "You forgot to take off your lipstick last night". I love longlasting lipsticks and have gotten used to the stain other than the fact it can be drying and if you don't remove it before the next application the next application won't go on evenly or true.
All in all, Covergirl's "Hot" is my go to drugstore red lipstick. I own 3 tubes (so far), wear it every single day, and only stock up when its on sale and with coupons. Despite its downfalls it is a fix it and forget it high impact lipstick, which is what I want.
Someday I may really splurge and buy the famous MAC Russian Red or Ruby -Woo ( That wouldn't be very beer budget of me now would it) but for now Hot is my perfect red lipstick.
Well , we have come to part three of finding the perfect red lipstick. Unfortunately , my super cheapy finds have not worked perfectly for me.
Oh, some could work, but when it comes to lipstick (especially red lipstick) I am very, very picky.
Therefore, I have moved on to more expensive, yet still reasonable drugstore lipstick finds.
My two favorite are L'oreal's "British Red " and Covergirls "Hot."
Now, both run about $6.00 to $8.00 at most places. Walmart is the cheapest. These lipsticks are much more expensive than what I would normally look at. I got "Hot" for around $3.00 because its about $6.00 at Walmart and I had a $3.00 off coupon."British Red" still cost me $7.00 with a $1.00 off coupon at Rite-Aid.
Both of these lipsticks are easily found at most mass market retailers or drugstores. Many drugstores like Rite-aid or Walgreens offer a b.o.g.o 50% off often. Quite often I have found Hot sold out at many places .
"British Red" from L'oreal is a gorgeous, creamy, lightweight, non-drying, shiny, satin finish corally red. I LOVE THIS SHADE. It makes me feel "rich" and sophisticated. However, it can pull orangey and is not a true red (in my opinion). Also, it is not long wearing enough for me. You need to apply this multipe times and touch up often to maintain its richness. Since I am used to wearing matte lipsticks this is a bit to "sheer" and glossy for me, even though I love the lightweight non-drying feeling of it. If this was a .99 cent to a $2.00 lipstick I might deal with the downfalls but not for $7.00. Sorry. I am way cheap and really, really hard to please. I want RED but am not willing to be high mainteance to look high maintenace. HAA!! (and it is possible)!
Covergirl's "Hot". Well, this baby is my (so far) all time winner for cheap red lipsticks. Why? well, its rich, creamy, dries to a long lo-o-ong lasting matte, yet non-drying finish. I can literally apply this in the morning an never touch up. I mean never (14 hrs). The color is great. Pat Mcgrath, the makeup artist for Covergirl, used this on 40+ different models in a spring 2013 fashion show. (sorry, I don't remember which one). I figured if 40+ models of all different skin tones could wear it so could I. Taylor Swift also uses this color. Plus, I have read its a close dupe to the famous MAC Russian Red.
Now, "Hot " does have a few downfalls. First, it doesn't seem true to shade all the time. Let me explain. On me it applies a vibrant poppy, yet still neutral, red. ( Its a blue red with a hint of coral). However, sometimes it can set up as a more cherry red (more truly cool blue based). Its sort off odd, but I still think it can work for alot of skin tones. If I apply it very heavy it seems to stay true to the poppy shade (which I prefer). But, applied heavily it can bleed (badly)and get on teeth. This lipstick is creamy but very heavy. It also stains. I mean it stains badly. I have to scrub, scrub , scrub my lips to remove it all and sometimes I wake up in the morning and my husband says "You forgot to take off your lipstick last night". I love longlasting lipsticks and have gotten used to the stain other than the fact it can be drying and if you don't remove it before the next application the next application won't go on evenly or true.
All in all, Covergirl's "Hot" is my go to drugstore red lipstick. I own 3 tubes (so far), wear it every single day, and only stock up when its on sale and with coupons. Despite its downfalls it is a fix it and forget it high impact lipstick, which is what I want.
Someday I may really splurge and buy the famous MAC Russian Red or Ruby -Woo ( That wouldn't be very beer budget of me now would it) but for now Hot is my perfect red lipstick.
Homemade deoderant! Say what?! Give it a try!
This is not a subject I would generally dive into. However, I really feel like I must. For most people, I would assume , applying deoderant is a daily function , just like showering, brushing your teeth, doing your makeup, etc... You don't really think about it , you just do it, its part of your daily routine. Well for me, and I don't think I am alone, deoderant is somewhat of a preoccupation. Face it, no one wants to stink, and well, some of us may feel we smell more than others.
I, for one, think I am one of those "smelly" people, weather it is actually true, or just a perception of mine, it bothers me. I, in the past 30 years, have tried every deoderant on the grocery store shelves at one time or another and still am not happy. ( The exception is Certian Dry. It works, but its it's expensive and gives me a rash). I have resigned myself to using Suave. Now, there is nothing wrong with Suave, with coupons I get it for like 40 cents. You can't beat that. It works as good as the rest. However, I still have to apply it twice a day not to be stinky, ( even more in the hot summer ) , and deal with the heavy scent (though Suave's scents are nice) . It's frustrating and sort of gives me a complex.
After reading hundreds of posts and articles I have come to realize that baking soda and cornstarch deoderant has a huge following. It has almost a 100% satisfaction rate. Honestly, I thought it was unbelievable and just for those "crazy green, modern day hippies", until I tried it myself.
I mixed 1 teaspoon of baking soda to 2 teaspoons of cornstarch. This should last me least a week ( I am way-y-y heavy handed), and I did it at such a small amount as a trial basis because I honestly didn't think it would work.
I mixed it well and put in in a ornate antique ceramic makeup jar that was my grandmothers because, A. I wanted to disguise it and, B. It looked pretty on my vanity. You can put it in anything you want , a jar, a tupperware container, as long as its sealed.
After showering and while I was in my towel and my armpits were damp, but not soaking wet, I dusted quite a large amount on using an old fluffy makeup brush. I applied it just like I was powdering my face. You could use your fingers to apply if you don't have a brush, I just thought the brush was quicker, more sanitary, and more uniform in application.
Now, this IS messy. Its like any other powder, it kind of goes everywhere if your not slow and presise in application (which I am not). Being skeptical I put a ton on and had quite a bit of transfer on my shirt when I got dressed. (Again, apply it directly after showering, before you get dressed).
I was shocked that I could remove the residue on my shirt with a damp cloth. Normally, if I would have gotten regular deoderant stains on my clothes I would have had to change.
I AM AMAZED. Its 10+ hours and I have zero sweat and ZERO odor. I am 100% "stink" free. I smell NOTHING. And I mean 100% NOTHING. When I use traditional deoderant I smell something at at least hour 4 (if I am lucky- most of the time its hour 2). Usually its a combination of the deoderant and "stink". Never, ever, ever have I been able to go this long an smell nothing. Truly, my mind is blown, and that is the only reason I am doing this post.
I have found most comercial deoderants are heavily scented to mask the "stink" smell. The unscented versions, even those for men, simply don't mask b.o. . I don't want to smell -period and I really don't want to smell my deodrant. If I want to smell I use my perfume, (thats why I have perfume ) not my deoderant.
The only draw back to this deoderant recipe is that the baking soda may cause a rash on some people. That is why I made such a small batch. Most posts I have read that complain of a rash is after a week or so. If you try this and experience any rash, itchyness or discomfort, up the cornstarch by one, whatever- your- equal -measurement, is to the baking soda, until you find the perfect recipe for you.
I personally do not see myself going back to commercial deoderant - ever, and this is only after one day. Trust me I am such a skeptic! This cost me pennies, does not stain my clothes, leaves me 100% dry, and is truly unscented. What is not to like ? If you don't like it no harm, no foul - go to the store and buy a stick of Secret or Suave or Dove or whatever.
 unsweetened cocoa powder (yes, like Hersheys- also in the baking aisle)