This, by far, was one of my most popular posts, as well as the simplest. Using honey as face wash is exactly that. However, I wanted to go back and update a bit. I have only used honey as a face wash for quite some time I thought as revisit was needed.
My skin care routine is so simple nowadays and I have actually stopped using foundation. You are talking to a girl who used full face makeup every day, 365 days a year for her whole life since the age of 15.
Honey has made this happen.
I still use makeup ( part is homemade and I will post on that latter) so at night I remove it with coconut oil, then "wash" my face with honey.
My original post stated that it really didn't matter what kind of honey you used- as I was using the little bear kind. I have found however, that the higher quality stuff is better. I still have not purchased "true" honey at my little local organic food store, but I do use the brands labeled "pure" and "raw" . I have found these at both my local grocery and Wal-mart. Now, I doubt they are truly raw or even pure, but they do seem a bit better than "generic" honey and since they only cost about 2 dollars more a bottle I will stick with them.
In the am, in the shower I simply slather my face with honey, massage it in a bit and rinse. Thats it. I do follow up with my tea toner ( I have posted on that before) and then use coconut oil as my moisturizer then apply my makeup.
In the pm I rub a generous amount of coconut oil onto my face. Then I use a fairly hot washcloth to wipe it off. Then with wet fingers (it seems to help spread the honey better) I massage a good amount , a teaspoon at least, of honey onto my face. I take the same washcloth- make it fairly hot but wrung out well, then leave it on my face a few seconds. Wipe. After that I tone and use my "Homemade facial serum" ( I will post on that to) as my pm moisturizer.
My skin has never, ever been better. BUT, (yes big but) it will not happen overnight. I noticed a improvement right a way but it took me a good month to truly notice real, able- to- go- foundation- free, results. I had a few blemishes show up a few weekd in and I was considering going back to castille soap or Dove. Now, after a few month in, I will never use anything else on my face to wash it other than honey!!
In recent years face primers seem to have become a must have. I am in my 40's (shhh!) and remember when primers didn't exist. For quite a few years I used to use milk of magnesia as a makeup "primer" to keep my super oily skin ander control and help my foundation stay "fresh" or I just didn't use primer and used a heavy duty foundation (Revlon Colorstay) and alot of powder. However, I have recently found a product (thank you Makeupalley!!) that has become a daily must have for me. Its Lanacane anti- chaffing gel! I have read many a review and post on using anti- chaffing gel as a face primer. After all, anti-chaffing gels are basically silicones and either talc or cornstach, which tend to be the basic ingredients in commercial cosmetic face primers that cost a whole heck of a lot more. Most reviews are for Monistat. Monistat has become harder and harder to find (at least for me) and I have used it in the past. While I liked it, it wasn't "all that". One day, at my local grocery store I spotted Lanacane's anti chaffing gel ( it near all the anti-itch stuff in the first aid aisle), It was a mere $6 bucks and since it was staring me in the face in the bright yellow box I picked it up. If it didn't work on my face I figured I could use it for its intended purpose.
I am 100% in love with this stuff. I simply take a half to a whole pea sized amount, no more because if you go overboard it WILL make you oily, negating the whole point of priming. I dab a bit on each cheek, chin and under eye then blend, blend, blend. I let it sit for a minute or two then apply my foundation.
This stuff allows me to use less foundation and it has also allowed me to use a cheaper foundation. It helps hold oil at bay all day on my oiy skin along with my cornstarch/cocoa powder face powder. My makeup also looks better.
Lanacane anit- chaffing gel is a staple in my makeup routine!
I have read many a review and post on using anti- chaffing gel as a face primer. After all, anti-chaffing gels are basically silicones and either talc or cornstach, which tend to be the basic ingredients in commercial cosmetic face primers that cost a whole heck of a lot more. Most reviews are for Monistat. Monistat has become harder and harder to find (at least for me) and I have used it in the past. While I liked it, it wasn't "all that". One day, at my local grocery store I spotted Lanacane's anti chaffing gel ( it near all the anti-itch stuff in the first aid aisle), It was a mere $6 bucks and since it was staring me in the face in the bright yellow box I picked it up. If it didn't work on my face I figured I could use it for its intended purpose.
I am 100% in love with this stuff. I simply take a half to a whole pea sized amount, no more because if you go overboard it WILL make you oily, negating the whole point of priming. I dab a bit on each cheek, chin and under eye then blend, blend, blend. I let it sit for a minute or two then apply my foundation.
This stuff allows me to use less foundation and it has also allowed me to use a cheaper foundation. It helps hold oil at bay all day on my oiy skin along with my cornstarch/cocoa powder face powder. My makeup also looks better.
Lanacane anit- chaffing gel is a staple in my makeup routine!
As a beauty junkie, I love to try new things and I love making beauty products too. My newest love is my leave- in spray conditioner.
Its simple. You will need-
1- 8oz. spray bottle. I got mine at Kmart for $1.99 and love it because it has a really strong sprayer but I have seen these as low as a dollar at the Dollar stores and Walmart.
Aloe Vera gel. I got mine at the local grocery store- they only had the green kind and it has alot of other stuff in it like glycerine and panthenol which is fine but I really wanted more "pure" aloe like Fruit of the Earth. But thats ok, as long as it does not contain any medicated ingredients your good. Also, make sure you get one that has real aloe within the first 1-3 ingredients. All aloe gels aren't created equal and they all aren't really aloe.
Coconut oil- or if you prefer, olive . I use coconut as it is lighter but in the winter, since coconut oil is a solid below 74-76 degrees I will have to use olive oil (but probably in a lesser amount- olive seems heavier to me) unless I choose to heat my leave in every morning. You could really use any old oil you have in your pantry, I only recommend coconut or olive due to the fact they are proven to actually penetrate the hair and strengthen it from the inside out.

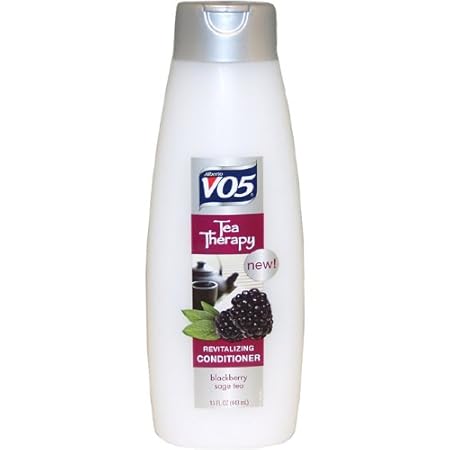
Cheapy, silicone free conditioner- I co-wash so I avoid silicones due to build up. I love the Vo5 tea conditioners or the sunkissed raspberry but any Vo5 would work, as would Suave Naturals. ( I choose based on what scent I'm in the mood for) Note- if you use a heavy and or silicone based conditioner this recipie may be to heavy, easpecially if you have fine hair but feel free to try it with whatever you like. Everyone's hair is different. Mine tends to be on the thinner side, colortreated, oily at the roots and dry/damaged through out the legnth. It is easily weighed down.
 Add 1 tablespoon each of the conditioner, oil and aloe gel to the 8oz. spray bottle than fill it with water, preferably distilled or water that has been boiled to distill it ( I won't pay for water so I boil it) Shake well to mix. Shake well before each use as the ingredients will seperate.
I love this stuff it makes my hair moisturized, soft and it even feels thicker. This is now part of my "must haves" in my beauty routine.
Add 1 tablespoon each of the conditioner, oil and aloe gel to the 8oz. spray bottle than fill it with water, preferably distilled or water that has been boiled to distill it ( I won't pay for water so I boil it) Shake well to mix. Shake well before each use as the ingredients will seperate.
I love this stuff it makes my hair moisturized, soft and it even feels thicker. This is now part of my "must haves" in my beauty routine.
I have been on a serious homemade kick. I have been finding that many homemade or "half- homemade" products work better and are far, far cheaper than commercial products ever could be. My newest venture is my tea toner, which has quickly become a must have or me. This is such an easy recipe and so easy to customize to your needs its not even funny and its so dirt cheap I could cry!
Take 2-4 teabags and 1/2 cup water. I usually use a mix of tea, 1 regualar (black) tea bag, 2 green tea bags and 1 herbal/fruit tea bag. I only use this mix because that is what I have in my pantry and I like it. Feel free to use whatever you have, its not rocket science, and teas (black, white, or green) all contain the same basic beneficial anti-aging, antioxident ingredients.
I don't buy expensive tea. My regular tea bags are .99 cents for a box of 100 and my green tea is .99 cents for a box of 75 . I did splurge on the herbal tea (Its Lipton blackberry vanilla) and it was a few bucks for only 20 bags.
If you only have black tea use 2 bags, only green tea use 4, and herbal tea should always be used along with the black and green tea because alot of herbal teas have no real tea in them- just herbs. Be careful if using herbal tea blends. I do not use any herbal teas that contains mint, lemon, or orange (not orange pekoe thats a type of black tea that most regular teas are made of) , as those ingredients can be irritating to skin. Some of you may not have a problem and prefer those teas better so just be careful. I love mint tea but don't want mint on my face. All natural doesn't always mean non-irritating. Also if you are allergic to any certain herb obviously do not any tea that contains them either.
To make your toner simply boil the half a cup of water, add the teabags, turn off the stove and let the tea steep for at least a half and hour. I often add a teaspoon of dried rosemary to my tea (for more antioxident benefits plus I like the scent) and when I do that I cover the pan and let it steep for about an hour.
After steeping transfer your toner to whatever container you prefer. I have a little antique glass bottle with a stopper that I use. This is your basic toner, which you should probably keep in the fridge. I have very oily skin so I add in a few more ingredients and I donot need refrigerate mine. It lasts me about 2 weeks. Use it twice a day after cleansing.
Add ins- these really are helpful for combo to oily skin but dry or overly sensitive skin may do better without these or adjust the amount to your liking
-Put 10 uncoated aspirin , for the salicylic acid benefits, (you can get a bottle of 100 for $1 at the Dollar Tree) in your container before pouring in your warm tea. Shake well before evey use. Will be gritty but that also provides exfoliation.
-Add one teaspoon of vinegar or witch hazel to your tea after its cooled. Both vinegar and witch hazel can be drying to skin but I think they help my oily skin more than hinder it and its such a little amount I have had no problems with dryness.
I add a drop or two of laveneder essential oil to my toner for scent, I adore the blended scent of rosemary, tea and lavender. Again if you use essential oils only literally use a drop or two. Too much essential oil can also cause skin irritation.
Have fun, try it and experiment with your own mix!
Its really amazing what you can find surfing the web. I have come across many, many posts about using honey as a face wash. Look, I'm willing to try almost any cheap, makeup, hair or skincare item once so needless to say I was very, very intrigued. Well, I may never go back to anything else now that I have tried honey as a face wash.
This is so simple I don't know why I haven't been using this forever. I could kick myself for all the money I have wasted over the years on stuff that either worked but was unimpressive, didn't work or even tortured my poor skin.
Go to the store and get yourself a bottle of honey if you don't already have one in your pantry. Now, many posts I have read say you should only buy organic honey, unproccessed dark honey, or honey from local farmers. This seems to be a must for all the "greenies". That's great, and if this is in your budget, or you are totally going "green" go right ahead. However, I find that the cheapest grocery store honey works just fine. ( I have nothing against being "green", fact is I am trying to add that into many parts of my life but I am far from being 100% truly organic and green and I am 100% fine with that at this time.)

To use in the Am. - Simply wet your face with warm water, take a bit of honey, it can be a teaspoon to a tablespoon depending on preference and massage it onto your face. I just squirt a bit onto my fingertips and go to town, adding more if needed. It should feel slipppery and your face should feel coated but not heavy. Mix it around a bit in circular motions a like a massage. Then, simply wipe of with warm wet washcloth or just rinse off if you are in the shower. I keep a bottle (yes, its the little bear kind) of honey in the shower just for this purpose.
In the Pm. -Simply repeat the Am method, using a warm wet washcloth, but , if you wear makeup you MUST remove it with oil first . Honey will not remove all your makeup by itself. I generally prefer coconut oil as my makeup remover because I have alot of it and use it for my hair, but really any old oil will work. This includes plain old vegetable oil, even though it does not seem very elegant. I am currently infusing olive oil with rosemary and plan on trying that soon. The makeup removal part I am not picky about, if you like baby oil- go for it it will remove your makeup wonderfully. Since I am trying to be more natural I don't use baby oil anymore. So, oil your face first then wipe it off with the warm, wet wash cloth. Rinse the cloth well with hot water. Apply your honey, massage it around then wipe off with the warm wet cloth ( I prefer microfiber, you can buy them in a pack of 3 at the Dollar Treee store for yes, one dollar.)
 I have only been using the honey on my face for 2 weeks and really am amazed. My skin is soft and smooth and is becoming more even toned. My skin has always been blotchy and uneven. I do have very oily skin, (though not blemish prone), but it seems to be much more balanced now. My pores look smaller but my skin looks "plumper". I use less foundation. Even though my skin is oily I used to use a moisturizer at night, probably because my previous face wash ( either Dove soap or baby wash, both of which worked good for me but perhaps a tad drying) no need now. I just wash my face use a homemade toner ( I will post that recipe also) and thats it.
I cannot believe how well honey is working for me. There may actually be a point where I don't need to cover my skin with a layer of foundation because my skin is that good! We will see, but for now honey is my end all be all face wash!
I really think anyone should try honey as a face wash. Its 100% natural and has anti- bacterial and healing properties. Of course, if you are alleric to honey don't try this- thats common sense- but for anyone else give it a go for at least a good 2 weeks to see how you like it. I don't think I will go back to anything else now. Plus there is a whole range of scrubs and masks you can make with honey ( I will post on those at a later date)
I have only been using the honey on my face for 2 weeks and really am amazed. My skin is soft and smooth and is becoming more even toned. My skin has always been blotchy and uneven. I do have very oily skin, (though not blemish prone), but it seems to be much more balanced now. My pores look smaller but my skin looks "plumper". I use less foundation. Even though my skin is oily I used to use a moisturizer at night, probably because my previous face wash ( either Dove soap or baby wash, both of which worked good for me but perhaps a tad drying) no need now. I just wash my face use a homemade toner ( I will post that recipe also) and thats it.
I cannot believe how well honey is working for me. There may actually be a point where I don't need to cover my skin with a layer of foundation because my skin is that good! We will see, but for now honey is my end all be all face wash!
I really think anyone should try honey as a face wash. Its 100% natural and has anti- bacterial and healing properties. Of course, if you are alleric to honey don't try this- thats common sense- but for anyone else give it a go for at least a good 2 weeks to see how you like it. I don't think I will go back to anything else now. Plus there is a whole range of scrubs and masks you can make with honey ( I will post on those at a later date)

 I am always on the lookout for cheap yet good ways to keep up with my beauty needs -I am a beauty junkie, and I am totally crazed about hair care. I am really not "green" per say but I am always surfing the web for "the best" or "alternative" hair care. I have done the whole co-wash thing, and been through everything from the cheap-o ( Suave ,VO5, Dollar store) stuff, to the heavy silicone laden ( Pantene, Herbal Essences) stuff, to silicone free ( Suave Naturals) stuff . I have decided to go to the more natural homemade route for many of my beauty needs. Honestly, nothing has ever worked better for me than this simple homemade hair rinse recipe- best part its CHEAP!
I have seen many posts using a honey rinse to add shine and help condition hair and I have also seen many posts using coconut milk as a conditioning treatment. Well, I got to thinking, (bad thing when I do that), and came up with a conditioning rinse that honestly I love so much I doubt I will ever go back to store bought conditioner.
Here's the recipe- ( It makes 12 or so cups- a gallon is 16 cups so this is quite a bit)
-4 cups coconut milk ( if using canned and not homemade- just get 2 cans it will suffice, its thicker than homemade - I prefer Goya brand if your going with the canned- I will tell you how to make homemade coconut milk at the end of this post)
-8 cups water (boiled then cooled a bit- so its basically distilled- this is important for preservation sake)
-1/3 cup honey ( I use the plain old honey from the grocery store, no need for organic)
-containers to store it (I use a re-purposed squirt bottle for in the shower and empty glass jars - like from pasta sauce or mason jars for storage in the fridge)
-Large container to mix it in ( old milk gallon jugs work good)
Pour your 1/3 cup honey into your large container- add your water, but make sure its still warm to hot as to melt the honey. Let that cool a bit then add your coconut milk. Stir very, very, very well, even shake it if your container has a lid, then pour into your smaller containers.
I use an old plastic squirt bottle (it was a ketchup container ) in the shower for my mix and store the rest in glass jars in the fridge for latter use. Since this is a rinse and not a traditional conditioner it is very thin and I use alot since I have rather long hair that I wash daily. I have a 25 oz. bottle in the shower that lasts about 3-4 days, depending on how heavy handed I get.. You need to shake well before each use as it does seperate. I really have no idea how long this would last out in the open but personally I wouldn't push it past 4 days in the heat, maybe a week in the winter. This is, after all, all natural with no preservatives other than whats in the coconut milk and the honey. The milk will spoil. When I need to refill my shower container I make sure I pull it out of the fridge the night before so it sets to room temp. You can tell when it goes bad, it will not smell light and conutty any more. For me, homemade coconut milk seems to stay fresher a bit longer than the canned. The 12 cup batch only lasts me about a week or so, with daily use. I do not know how long it will keep in the fridge, I have not had it go bad in the fridge for up to 10 ten days so far. You may be better off making smaller batches more often if you are worried about freshness or do not wash your hair daily.
I am always on the lookout for cheap yet good ways to keep up with my beauty needs -I am a beauty junkie, and I am totally crazed about hair care. I am really not "green" per say but I am always surfing the web for "the best" or "alternative" hair care. I have done the whole co-wash thing, and been through everything from the cheap-o ( Suave ,VO5, Dollar store) stuff, to the heavy silicone laden ( Pantene, Herbal Essences) stuff, to silicone free ( Suave Naturals) stuff . I have decided to go to the more natural homemade route for many of my beauty needs. Honestly, nothing has ever worked better for me than this simple homemade hair rinse recipe- best part its CHEAP!
I have seen many posts using a honey rinse to add shine and help condition hair and I have also seen many posts using coconut milk as a conditioning treatment. Well, I got to thinking, (bad thing when I do that), and came up with a conditioning rinse that honestly I love so much I doubt I will ever go back to store bought conditioner.
Here's the recipe- ( It makes 12 or so cups- a gallon is 16 cups so this is quite a bit)
-4 cups coconut milk ( if using canned and not homemade- just get 2 cans it will suffice, its thicker than homemade - I prefer Goya brand if your going with the canned- I will tell you how to make homemade coconut milk at the end of this post)
-8 cups water (boiled then cooled a bit- so its basically distilled- this is important for preservation sake)
-1/3 cup honey ( I use the plain old honey from the grocery store, no need for organic)
-containers to store it (I use a re-purposed squirt bottle for in the shower and empty glass jars - like from pasta sauce or mason jars for storage in the fridge)
-Large container to mix it in ( old milk gallon jugs work good)
Pour your 1/3 cup honey into your large container- add your water, but make sure its still warm to hot as to melt the honey. Let that cool a bit then add your coconut milk. Stir very, very, very well, even shake it if your container has a lid, then pour into your smaller containers.
I use an old plastic squirt bottle (it was a ketchup container ) in the shower for my mix and store the rest in glass jars in the fridge for latter use. Since this is a rinse and not a traditional conditioner it is very thin and I use alot since I have rather long hair that I wash daily. I have a 25 oz. bottle in the shower that lasts about 3-4 days, depending on how heavy handed I get.. You need to shake well before each use as it does seperate. I really have no idea how long this would last out in the open but personally I wouldn't push it past 4 days in the heat, maybe a week in the winter. This is, after all, all natural with no preservatives other than whats in the coconut milk and the honey. The milk will spoil. When I need to refill my shower container I make sure I pull it out of the fridge the night before so it sets to room temp. You can tell when it goes bad, it will not smell light and conutty any more. For me, homemade coconut milk seems to stay fresher a bit longer than the canned. The 12 cup batch only lasts me about a week or so, with daily use. I do not know how long it will keep in the fridge, I have not had it go bad in the fridge for up to 10 ten days so far. You may be better off making smaller batches more often if you are worried about freshness or do not wash your hair daily.

This mix leaves my hair so, so soft and shiny. Plus it feels moisturized to the very ends and it NEVER builds up. Now, it is NOT detanging by any right. Honestly, I had to take an ungodly amount of time to untangle my hair after first using this. It was so bad nad I pulled out so much hair, that I thought I was going to throw out the whole batch and go back to store bought. However, it was worth it in the end and the more I use it the better it seems to be plus I have found a semi- homemade detangler recipe that helps with the tangle issues. I will post on that later.
I have to say I will never go back to a store bought conditioner after using this ( unless I go back to co-washing). My hair is finally perfect ,as perfect as it will get, every day, it has no build up and I swear is starting to grow. I also use straight coconut oil as as leave or an overnight conditioner with this mix so it may be the coconut oil that is actually helping, regardless, this coconut milk/ honey rinse is my holy grail hair conditioner.
To make homemade coconut milk (easy way)-
put 1/2 cup of packed coconut flakes into a blender- I can only find sweetened coconut flakes in my area (they are in the baking aisle) They do contain propelene glycol as a preservative. Propelene glycol is found in tradition conditioners as a humectant so I have no problem using sweetened coconut flakes. Besides I think the propelene glycol helps my homemade coconut milk last longer than the canned.
add
2 cups boiled and cooled, but still hot, water
blend till flakes are pulverized- just a few minutes
Strain very well with strainer or cloth, reserve coconut milk, throw out flakes, and repeat with fresh boiled water and flakes till you get your desired amount of milk.
This makes the best coconut milk in my opinion. If you want richer milk add more coconut (like 1 cup per 2 cup water), thinner milk, use 1/2 cup coconut to 4 cup water.
You can also add all kinds of stuff to this rinse if you so like. I have infused rosemary ( 1 tablespoon per cup water) and green tea ( 2 tea bags per cup) in the water I use to make my rinse. It smells lovely, works great, but has an ugly brownish shade to it. You can also add essential oils if thats your thing ( I love lavender) . If you have really dry, thick, coarse hair add some lighter oil like safflower or sunflower oil to the mix. Make sure to shake extra well if you add additional oils beacause the oil will settle on the top of the rinse.
This really is a basic recipe, and I am only posting about what works for me. Please feel free to experiment and have fun. After all thats what beauty should be about.
I am so exicted. While browsing the web I have come across alot of posts for homemade face powder. I'm so impressed! It actually works- like really, really good!
Now, I have long used baby powder as my setting powder. I used to use the talc based powder as the cornstarch based one can cause blemishes. However, I have recently changed to the cornstarch based powder as it seems to give me a better (softer) finish and its more absorbent (at least for me) than talc. I have oily skin (like the desert of Kuwait) but its not really blemish prone and I haven't had any problems with the cornstarch. But don't say I didn't warn you in case you try it and break out a week later.
The only issue I have ever had with baby powder is that it can be too white, especially in the summer months when bronzer is better. I remedy this by applying it very lightly and wearing a slightly darker foundation. Now, I have found an even better solution.
 Pure cornstarch (in the baking aisle)
and
Pure cornstarch (in the baking aisle)
and
 unsweetened cocoa powder (yes, like Hersheys- also in the baking aisle)
I was amazed. Pure cornstarch is actually finer milled and more absorbent than the baby powder version and its cheaper but its really, really white.
Cocoa powder has natural antioxidant properties and isn't a skin irritant plus it has that lovely neutral, natural, soft brown color.
Mix them together and Ta-da ! Perfect oil absorbing loose face powder.
I am light so I started with 1/2 cup cornstarch to 1 teaspoon cocoa powder. Yes, thats alot to start with but for some reason I can't do anything in small batches. This mix is perfect for me. I mix it up then put it in a old glass jar. I sprinkle some on the lid, use a big fluffy brush, swirl and tap, then buff onto skin over my foundation. I am perfectly matte and shine free all day. I love it.
Now, you need to custom mix this for your skin tone. Perhaps start out with 1 tablespoon of cornstarch and a 1/8 teaspoon or a sprinkle of cocoa, adding more cocoa to deepen the shade. To much cocoa, add more cornstarch. Record your efforts so you have the correct measurments. It really is trail and error. Once you have your perfect blend you will never go back to regular powder. Since I am light I can actually get away with no cocoa powder in my cornstarch, especially in the winter, so for me the small amount of cocoa to large amount of cornstarch was fine, I didn't have to try too hard.
A couple of tips-
-This is really messy to make so beware, you are working with 2 finely ground powders.
-You can also make this with baby powder, not just pure cornstarch, and if you are blemish prone you may want to use talc based baby powder ( there is alot of information on talc out there about how bad it is, supposedly, so do your own research. I personally don't have a problem with talc, but to each his own.)
- This may be to drying for dry skin, it is very absorbent.
- This can double as a sheer powder foundation for those who have great skin or just want a very natural look. The cocoa seems to give enough color along with the mattifying cornstarch to just even out your skin tone. It won't cover anything but it will even it out.
I use this and am matte and touch up free all day. I usually have my makeup on 12 or more hours so this really is a remarkable feat. I am waiting for the real test to come in th dead of summer so I will update then but so far I have never ever found a better face powder.
unsweetened cocoa powder (yes, like Hersheys- also in the baking aisle)
I was amazed. Pure cornstarch is actually finer milled and more absorbent than the baby powder version and its cheaper but its really, really white.
Cocoa powder has natural antioxidant properties and isn't a skin irritant plus it has that lovely neutral, natural, soft brown color.
Mix them together and Ta-da ! Perfect oil absorbing loose face powder.
I am light so I started with 1/2 cup cornstarch to 1 teaspoon cocoa powder. Yes, thats alot to start with but for some reason I can't do anything in small batches. This mix is perfect for me. I mix it up then put it in a old glass jar. I sprinkle some on the lid, use a big fluffy brush, swirl and tap, then buff onto skin over my foundation. I am perfectly matte and shine free all day. I love it.
Now, you need to custom mix this for your skin tone. Perhaps start out with 1 tablespoon of cornstarch and a 1/8 teaspoon or a sprinkle of cocoa, adding more cocoa to deepen the shade. To much cocoa, add more cornstarch. Record your efforts so you have the correct measurments. It really is trail and error. Once you have your perfect blend you will never go back to regular powder. Since I am light I can actually get away with no cocoa powder in my cornstarch, especially in the winter, so for me the small amount of cocoa to large amount of cornstarch was fine, I didn't have to try too hard.
A couple of tips-
-This is really messy to make so beware, you are working with 2 finely ground powders.
-You can also make this with baby powder, not just pure cornstarch, and if you are blemish prone you may want to use talc based baby powder ( there is alot of information on talc out there about how bad it is, supposedly, so do your own research. I personally don't have a problem with talc, but to each his own.)
- This may be to drying for dry skin, it is very absorbent.
- This can double as a sheer powder foundation for those who have great skin or just want a very natural look. The cocoa seems to give enough color along with the mattifying cornstarch to just even out your skin tone. It won't cover anything but it will even it out.
I use this and am matte and touch up free all day. I usually have my makeup on 12 or more hours so this really is a remarkable feat. I am waiting for the real test to come in th dead of summer so I will update then but so far I have never ever found a better face powder.


